
In this case study, we will take a look at exporting User data into a third party application used to send emails. This could be run in a scenario where we wanted to target specific Users in certain circumstances such as emailing Members who have allowed their membership to expire.
The goal
This article is about testing the reporting controls in Bilby, so we will try some common scenarios that could be run in a real world club. This will give us some insights into the flexibility of our controls. The goal for this scenario is to find User records that have a status of Expired and export that data into the third party application Mailchimp.
Message
Part 1 - Collecting the data from Bilby
In this scenario, we know we will be sending emails to Users, but we can also do some fun things with other fields in Mailchimp, so we might collect some other fields that could be useful.
Here are the fields we are going to collect.
Name - This is probably a pretty important fields to collect in our exported data.
Email - Like name, this is one of the essentials.
Status - Because we are targeting expired Users in this scenario, we will collect this field to use as a tag in Mailchimp.
Expiry Date - I’m not sure if we will use this, but we will collect it and see if something comes up.
1.1 Adding the report columns
We know what columns we are interested in, so firstly we select the “Columns” option, then we can use the “Remove” button to get rid of fields we don’t need. Then we can select the above fields. Once that is done, we should have a column configuration just like the image below.
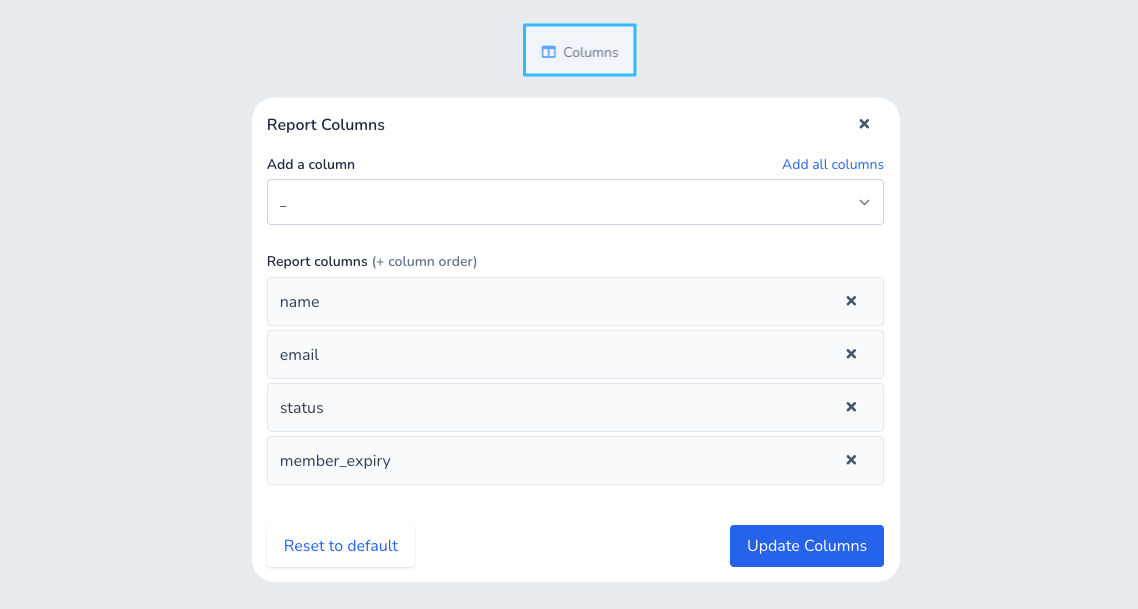
Removing columns and changing column order using the buttons provided.
Once we have our select columns we can click the “Update” button to make sure the changes are applied.
1.2 Update the sorting and page size
We are not expecting too many records to be returned from this example, so we will simply add sorting by “member_expiry” and leave the default order direction. We will also keep the default 20 records per page size. In examples where you may be expecting many records, you may want to add some other sorting/paging criteria, but for this particular report, the filters will be doing the heavy lifting.
Ok, on to the filtering.
1.3 Adding filtering to the report
To get value out of this report, we want to know who has expired recently, so we will filter out anyone that has expired after the start of this year. We will also only grab Users that have a status of “Expired”.
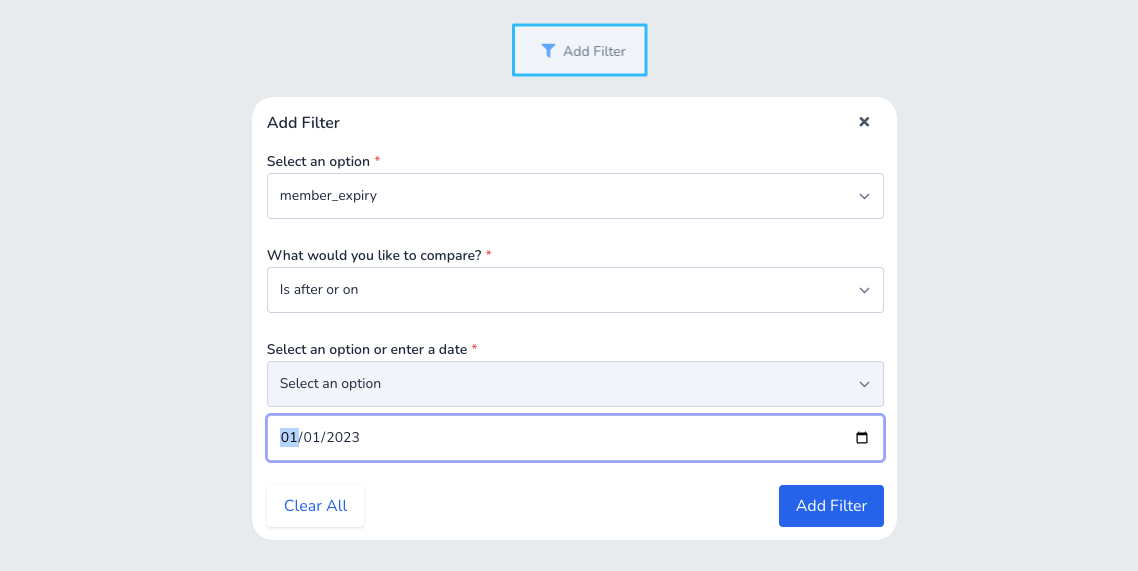
Adding the filter for member expiry.
Once we have added our filters, we can see 8 user records that match our criteria from our generated fake dataset.
1.4 Exporting the data to CSV
We now have a good looking report and can see a small list of Users that fit our criteria. We will use the “Export to CSV” controls provided to download this report and start importing into Mailchimp.
Export Data to CSV Control
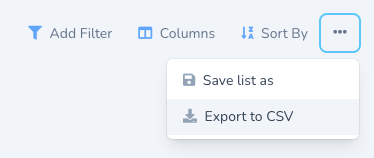
Export data controls.
User Management Screen
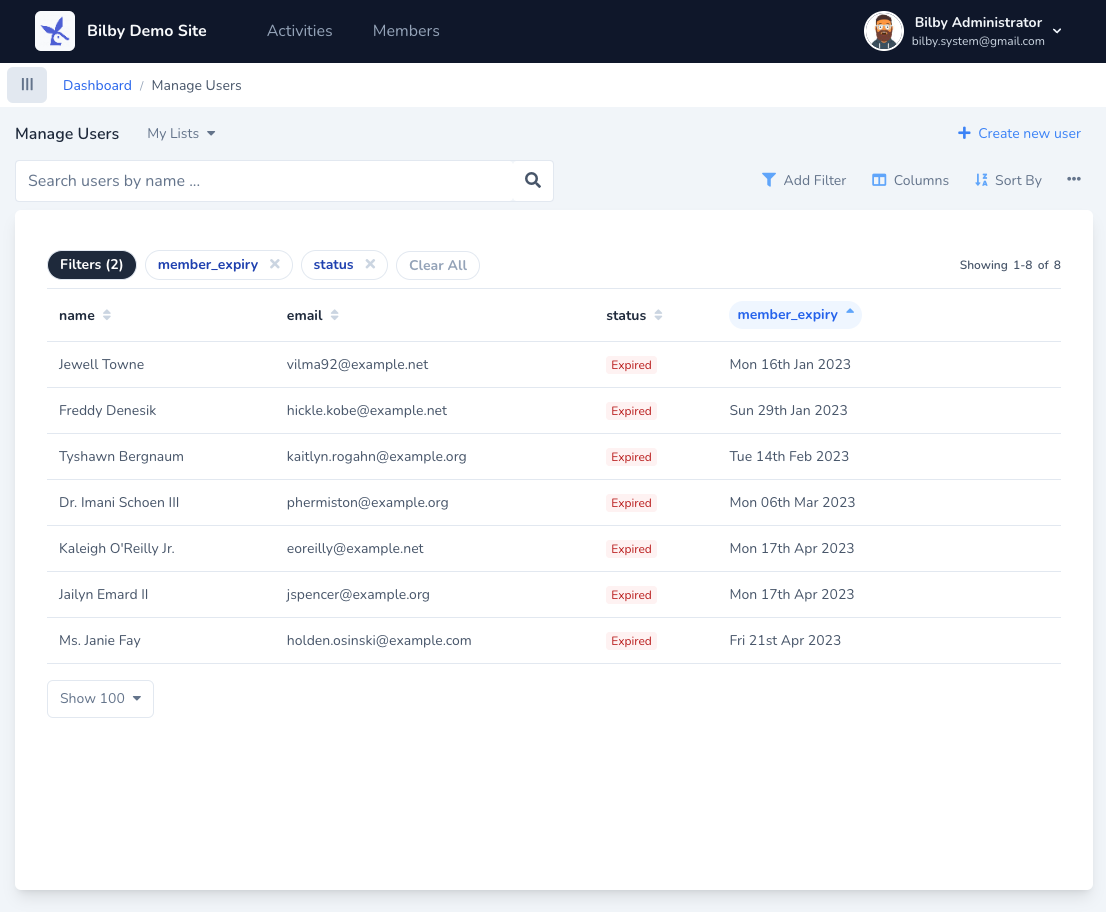
Bilby Management Software with filtering applied to Users.
Part 2 - Importing data into Mailchimp
Caution
Processing the data in Mailchimp is out of scope for this case study, so we will only go as far as basic steps for importing the data. To be successful in our goal, we will need to create a free account, get that verified and then start the import.
- Navigate to Dashboard > Audience > All Contacts
- Click on “Add Contacts” and then “Import Contacts”
- Select “upload a file” and upload the CSV from Bilby with our report data
- Continue to “Organize” and follow the upload wizard
- Finalize the upload and our contacts have been imported
A quick note on the Organize wizard. We used the “status” of expired as a tag, and the “member_expiry” date as a custom field, this allowed us to use this data in our email campaign. This seemed like handy information for us to know.
2.1 Running a campaign
So, we now have a contact list and all that is left to do is create an email campaign in Mailchimp.
I will not document any steps here as there are many many resources on the web dedicated to learning about Mailchimp, but with a few clicks we were able to configure a campaign and send an email to our contact list. There were a couple of notes about our experience working with Mailchimp.
-
When we first imported our list, it made sense to import it as a “Non-subscribed” list. In retrospect, this might not have been the correct option as we learnt that Non-subscribed means a User that interacts with the system on a transactional basis only. This blocked us from sending an email campaign but was fixed by archiving the Users, and then re-importing the list as “Subscribers” without changing any information.
-
Working with the designer interface was great. It was super easy to make a good looking email. We could easily get lost in the details and spend hours tailoring an email campaign, but I can see once that is all configured, sending future emails would be a breeze.
Wrap up
Exporting the data and importing into a third party such as Mailchimp was a reasonably easy process. Exporting data, and re-importing into a third party app is a powerful tool and can be used in other applications with well defined structures.
We can see some excellent use cases to support more features like these in the future. A sneak peak of our ideas include; Bilby lists (like Activities) as an RSS feed that can be consumed by Mailchimp and scheduled as a weekly reoccurring email sent to your Members!
If you have not checked out the case study on importing activity map data into Google Earth, it might be worth checking out. You can see the Article Here.